How to Deploy A Windows Virtual Machine & Connect To It Using RDP
You will need a free subscription to be able to follow this procedure. In case you don’t have one, please do create one here .
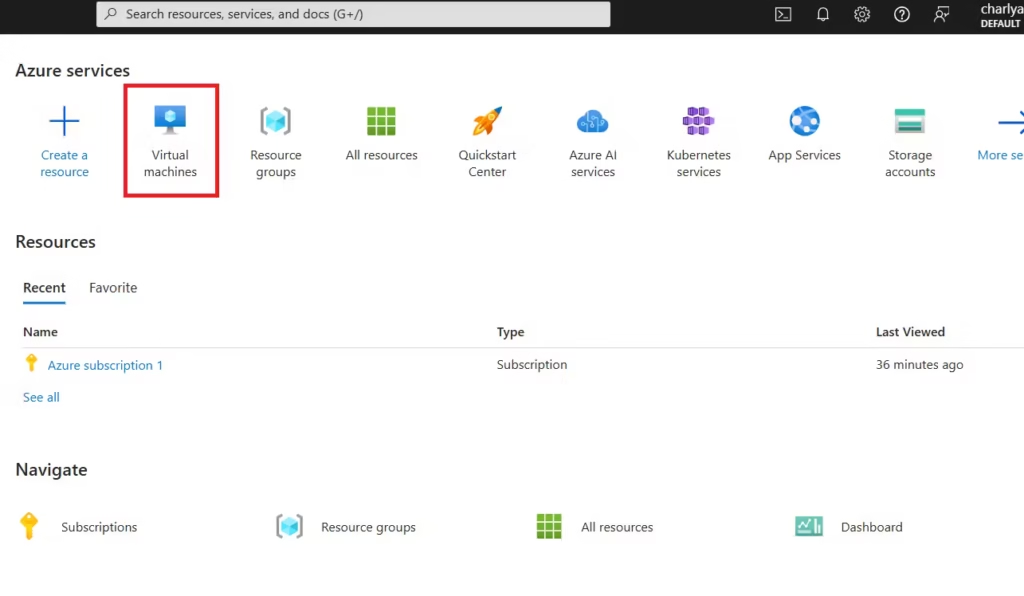
- Search virtual machines or click on the virtual machine button, as seen in the image below.
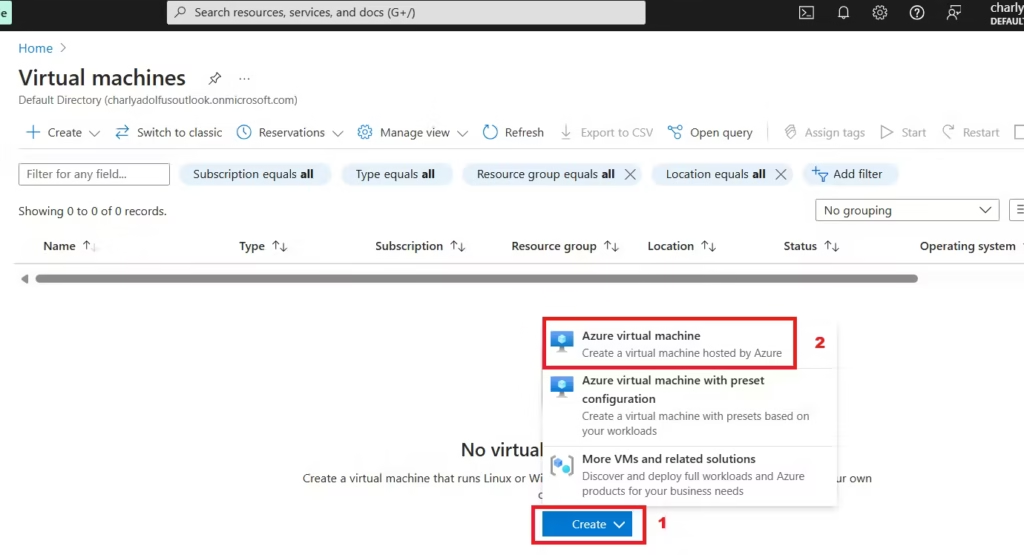
2. Choose Create, followed by Azure virtual machine, from the virtual machines page.
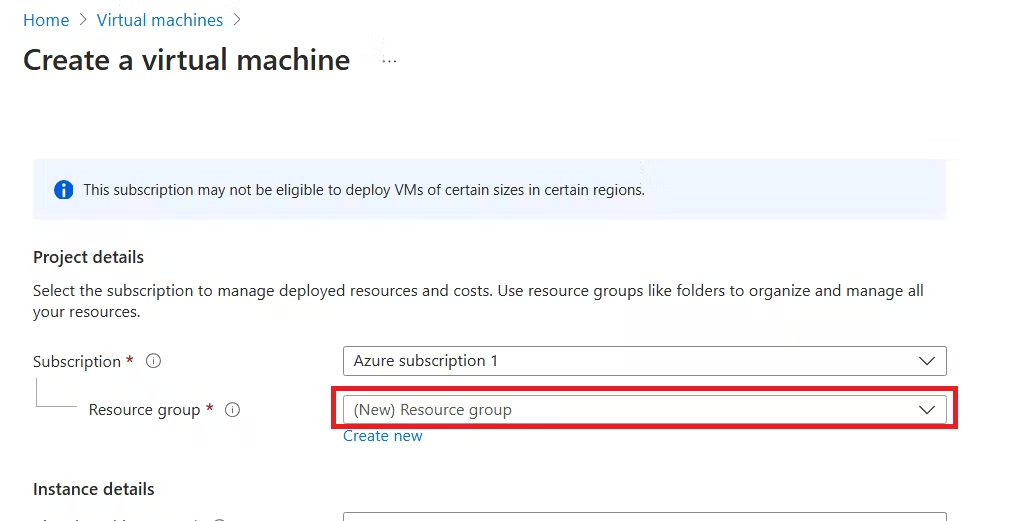
3. Make a resource group under the project details as that’s where all of your projects and deployments should live.
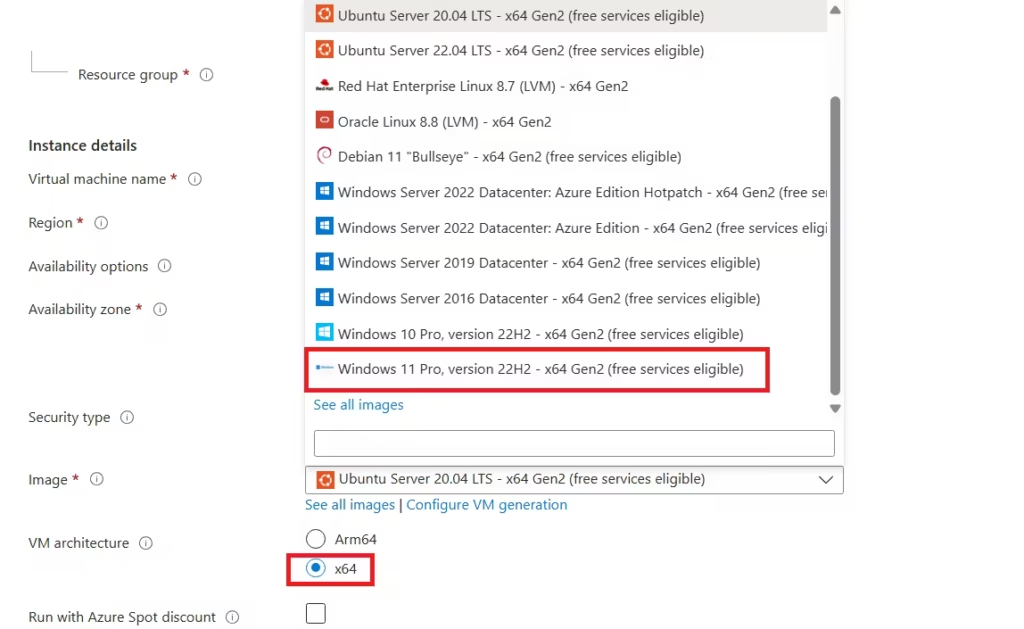
4. Under “Instance details” provide the virtual machine’s name and select your preferred availability zone from the dropdown menu.
It is important to note that selecting all three zones replicates the virtual machine in each of them.

5. Select the operating system that you want from the dropdown. In this example, we are utilizing Windows 11 pro(64bits).
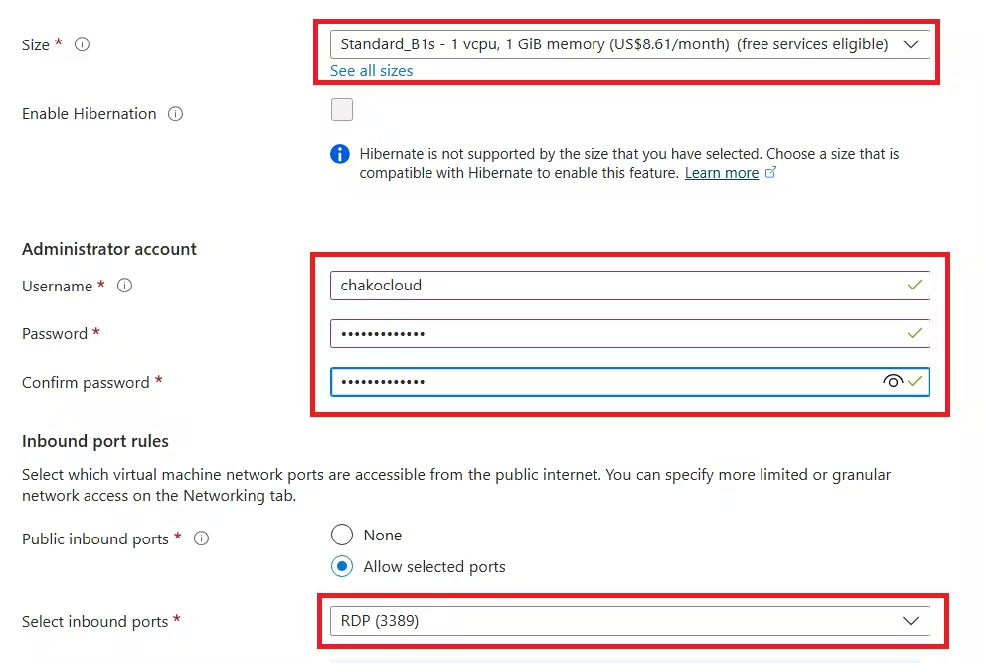
6. Select the storage capacity and provide a username and password. Under Inbound port rules, choose Allow selected ports and then select RDP (3389) from the drop-down.
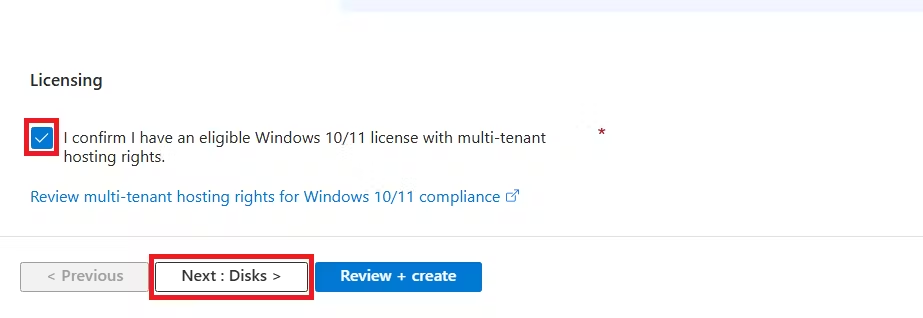
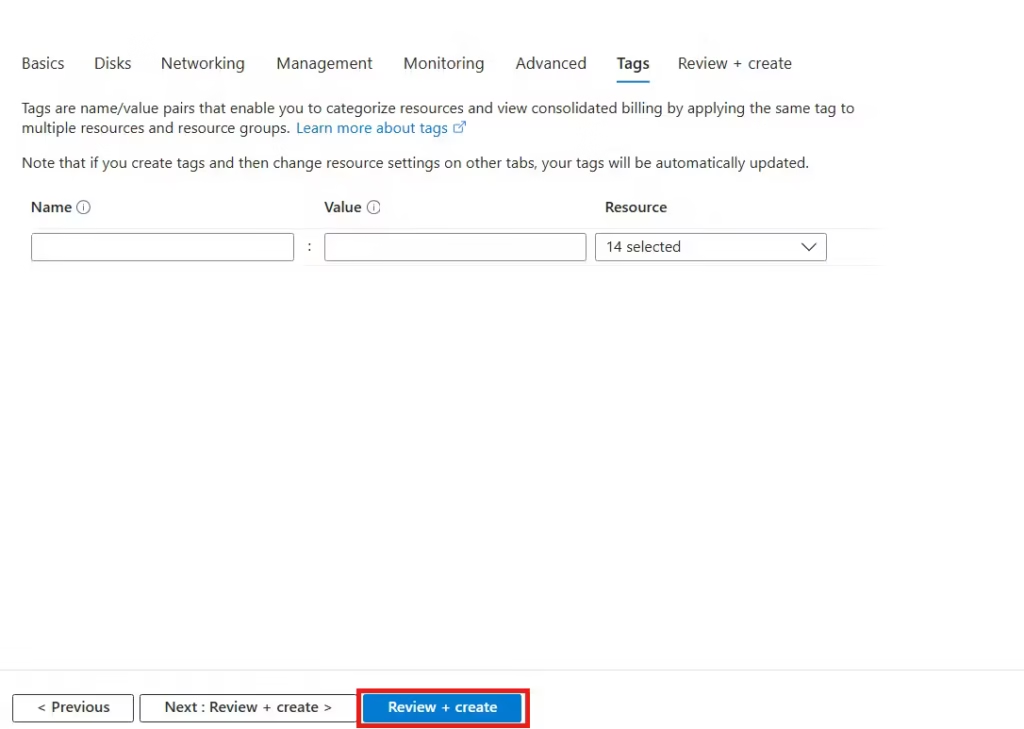
7. Click confirm licensing and then click next to proceed to the next step.
8. Leave the remaining default values as they are, then select the Review + Create button at the bottom of the page.
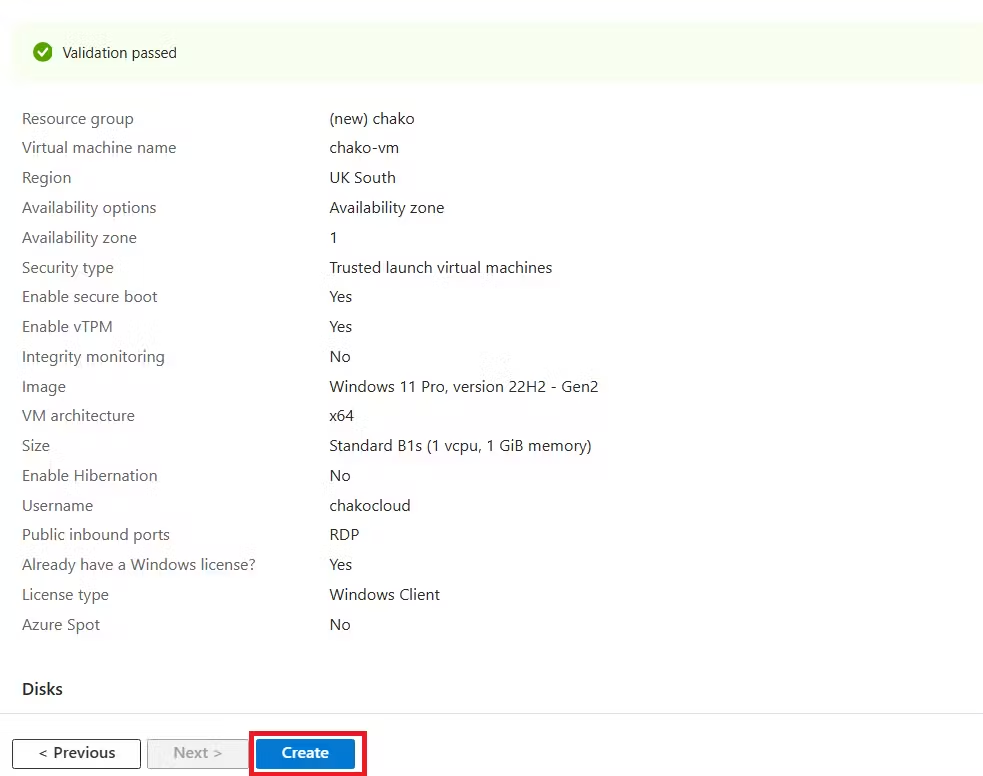
9. After validation has run, select the create button at the bottom of the page.
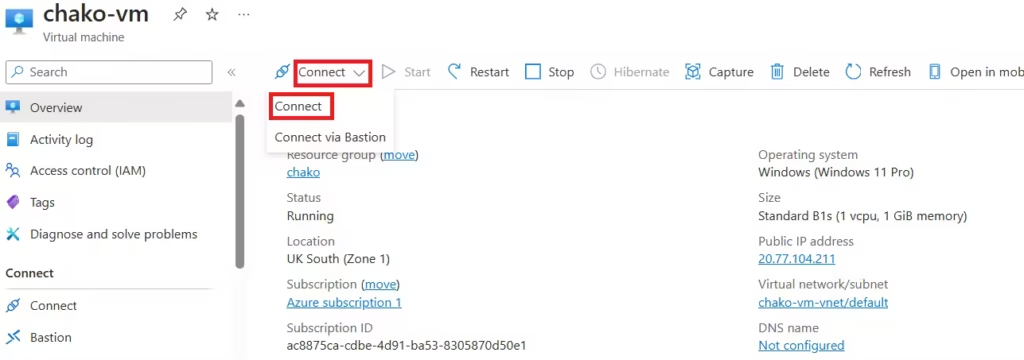
10. Once the deployment is complete, select Go to resource.

Connect to the virtual machine via RDP
- On the virtual machine overview page, select Connect, and then select Connect from the drop-down menu.
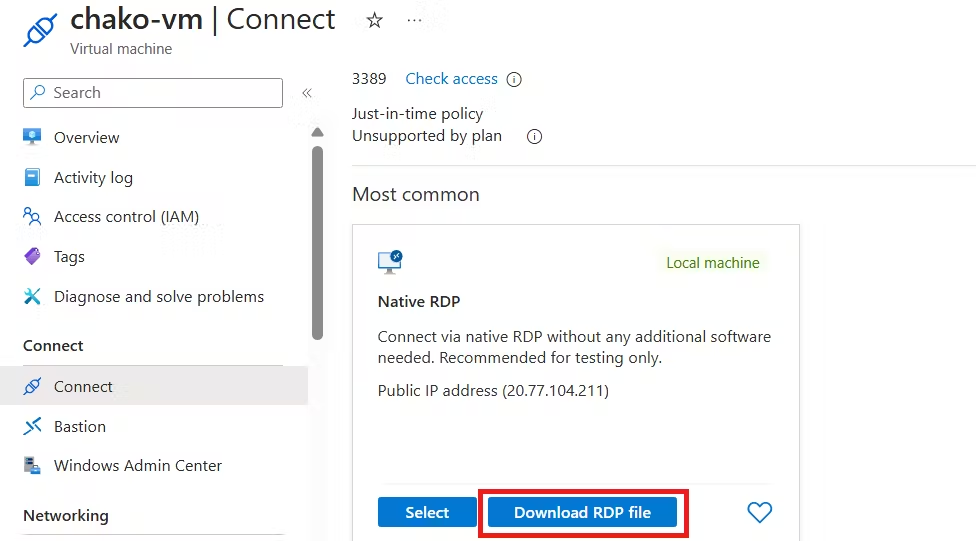
2. Download the RDP file to local machine
- Open the downloaded RDP file and click Connect when prompted.
- Enter the username, and the password you created for the virtual machine, and click OK.
- A certificate warning may appear during the login process.
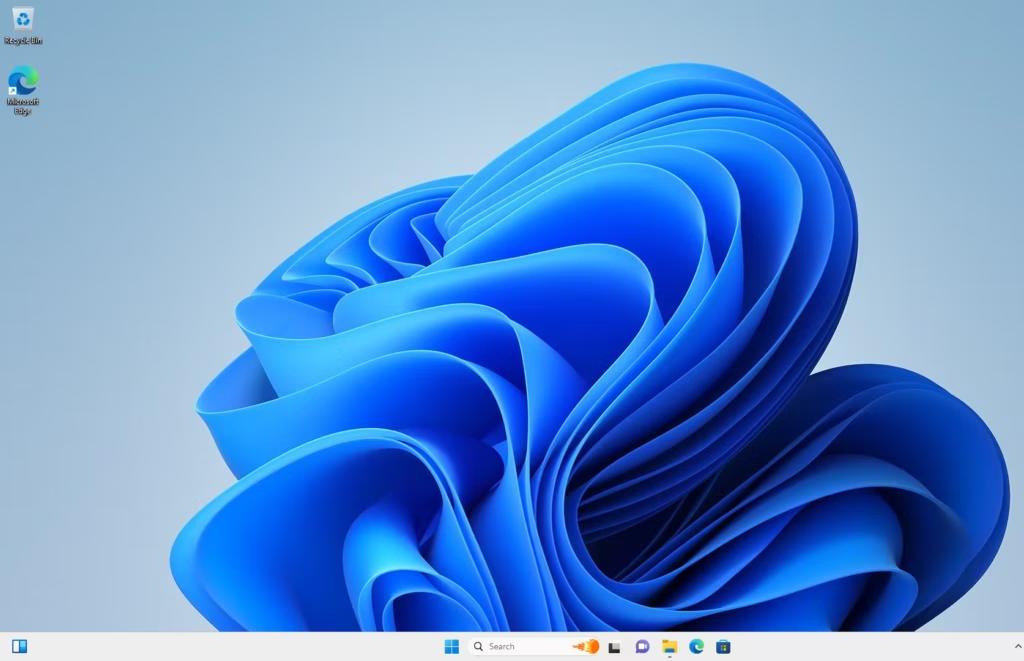
- Click Yes to complete the connection.If everything is done correctly, Windows will boot and load, as shown below:
Greetings! I am Charly, an aspiring DevOps Engineer. Recently, I began the lengthy process of transitioning from Logistics to Technology. Technology has been my passion, having worked in tech support in the past. Welcome to my blog, where I will chronicle my daily learning journey toward becoming a DevOps Engineer.